- Log in to the Azure portal at https://portal.azure.com ➢ navigate to the Azure Synapse Analytics workspace you created in Exercise 3.3 ➢ click the Open link in the Open Synapse Studio tile on the Overview blade ➢ select the Develop hub ➢ expand the Data Flows section ➢ hover over the Ch04Ex12 data flow ➢ click the ellipse (…) ➢ select Clone from the pop‐up menu ➢ and then update the name (I used Ch06Ex10).
- Enable the Data Flow Debug toggle switch ➢ using, for example, Azure Data Studio, execute the following INSERT and UPDATE statements on the Azure SQL database you created in Exercise 2.1. The syntax is available in the UpsertData.sql file located in the Chapter06/Ch06Ex10 directory on GitHub.
- Select the Sink transformation in the data flow ➢ select the Settings tab ➢ deselect Allow Insert ➢ select the Allow Upsert check box (as shown in Figure 6.49) ➢ and then click the Add Alter Row button.
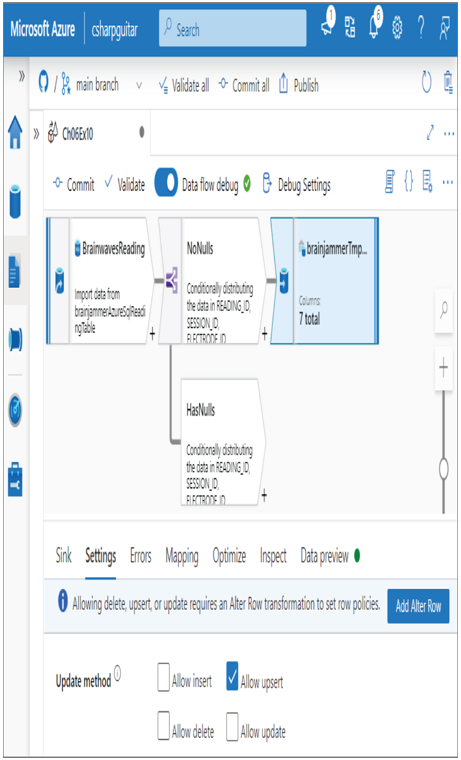
FIGURE 6.49 Upsert data—update methods
- Name the Alter Row transformation (I used UpdateBrainwaves) ➢ select Upsert If from the Alter Row Conditions drop‐down list box ➢ enter true() in the Condition text box ➢ select the Data Preview tab ➢ click the Refresh button ➢ and then view the results of the true() condition.
- Select the Sink transformation ➢ select the Settings tab ➢ select the List of Columns radio button in the Key Columns section ➢ select READING_ID from the first drop‐down text box ➢ click the + next to the drop‐down text box ➢ select VALUE from the drop‐down text box ➢ select the Data Preview tab ➢ and then click Refresh. The result will be something like Figure 6.50.
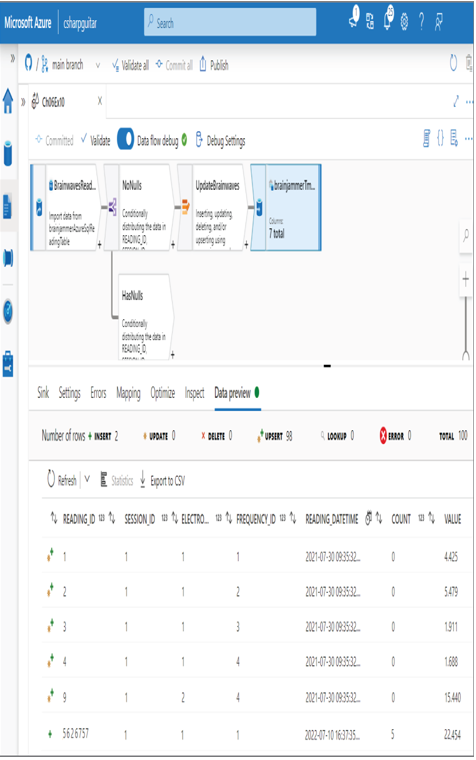
FIGURE 6.50 Upsert data—sink data preview
- Click the Commit button, and then select the Publish menu item.
The Clone feature mentioned in step 1 can be very useful. Instead of needing to re‐create and reconfigure the entire data flow from scratch, you cloned it and made the necessary modifications. This saves valuable time. When you selected the Settings tab for the Sink transformation in step 3, because the sink was a database, you were given the option to perform upserts. Had the sink been a file, for example, the option for upsert would not have been rendered. The available options, as shown in Figure 6.49, are as follows:
• Allow Insert
• Allow Delete
• Allow Upsert
• Allow Update
In Exercise 6.10 you disabled Allow Insert. This was to prevent the data that exists in the source from being reinserted and duplicated into the sink. If you needed to delete some data from the sink, then checking the Allow Delete check box would allow this to happen. You would then need to include a Delete If condition, perhaps like that shown in Figure 6.51. The condition of isNull(VALUE)will result in rows with no reading number in the VALUE column being deleted.
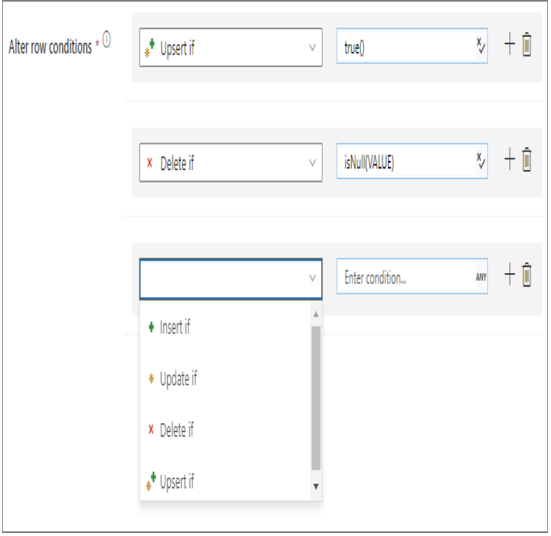
FIGURE 6.51 Upsert data—Delete If
The same goes for Allow Update, in that regardless of which condition you place in the condition text box, if the result is true, then the sink will update that row. Regarding Allow Upsert, recall that the condition was set to true(). This means that all the rows are sent to the sink for processing. Because the Allow Upsert check box is checked, Azure Synapse Analytics handles the logistics around whether to update or insert the row. The selection of READING_ID and VALUE on the Settings tab of the sink provides the instructions to determine which rows are updated or inserted. If a row matches both the READING_ID and the VALUE, then the row is updated; otherwise, the row is inserted. If you wanted to then run the data flow from the IngestTransformBrainwaveReadings pipeline you created in Exercise 5.1, you could clone it and then update the MoveToTmpReading Data Flow activity to target the Ch06Ex10 data flow instead of Ch04Ex12. The cloned pipeline must be successfully published prior to execution. Once the pipeline is executed, you will see the two rows updated and two new rows inserted, as per the update and insert statements you executed in step 2.